Table of Contents
What is the Fleet application?
Accessing the Fleet application
Application alerts and notifications
Device search functionality
Device list
Device actions
Device information
Live energy data
Open in Onboarding
Site search functionality
Sites list
Add or Edit Site
Site access privacy considerations
Change Password
API Keys
Logout
More information or support
What is the Fleet application?
The Wattwatchers Fleet Management application is used to manage and monitor Wattwatchers devices, create sites and assign devices for end-user access management.
Accessing the Fleet application
The Fleet Management application is part of the Wattwatchers software toolkit. It is accessed from a desktop or mobile device using a web browser at https://wattwatchers.app.
Your account will be created for you by the Wattwatchers team as part of your setup and training process, or you can contact Wattwatchers Support to request access.
Enter your username and password and press the Login button to access the Wattwatchers applications. If you do not know your account credentials, follow the steps outlined in our Quick Answers: How do I reset my password?.

After logging in, if you have access to other Wattwatchers applications, you may be shown the application icons for Fleet, Onboarding and Dashboard. Select the Fleet icon to continue to the Fleet application.

You can return to this application selector at any time by clicking on the  icon in the top left corner of the Fleet Management app.
Menu Bar


Depending on the level of access you have been assigned, the menu bar at the top of the page provides access to the following menu items:
- Wattwatchers logo - return to the Fleet, Onboarding and Dashboard application selection.
- Fleet - drop down this menu to select from a list of fleet groups that you have access to view.
- Devices - provides a live listing of all the devices and their current status for the currently selected Fleet. From here you can access more information about each device, including real-time energy data.
- Installs - provides a dashboard of information on your devices that have been installed recently.
- Sites - provides access to create and edit the sites that are available to your customers via the Dashboard and mydata.energy apps.
- Profile menu (person icon, far right) - provides access to change password, view API keys and to logout functions.
Selecting a Fleet Group
If you have access to more than one fleet click or tap the Fleet menu in the Menu Bar and select the desired fleet group for the devices that you wish to manage.
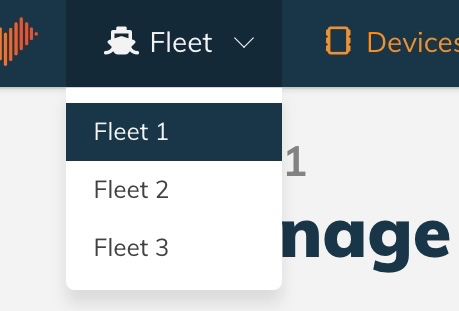
A Fleet is a group of devices assigned to the same device group/API key. The assignment of a device to a Fleet is managed by the Wattwatchers support team. Individual devices can be assigned to more than one fleet group.
Note that a Fleet app user can be assigned access to one or more Fleets. Different users may have access to different fleet groups even if they work for the same organisation.
Please contact Wattwatchers Support if you require assistance with your fleet group access and device assignments.
Application alerts and notifications
If there are any alerts or notifications from the Wattwatchers Support team, these are displayed below the heading on any pages.

Click on the X icon in the top right corner of the message to close the notification.
Manage Devices
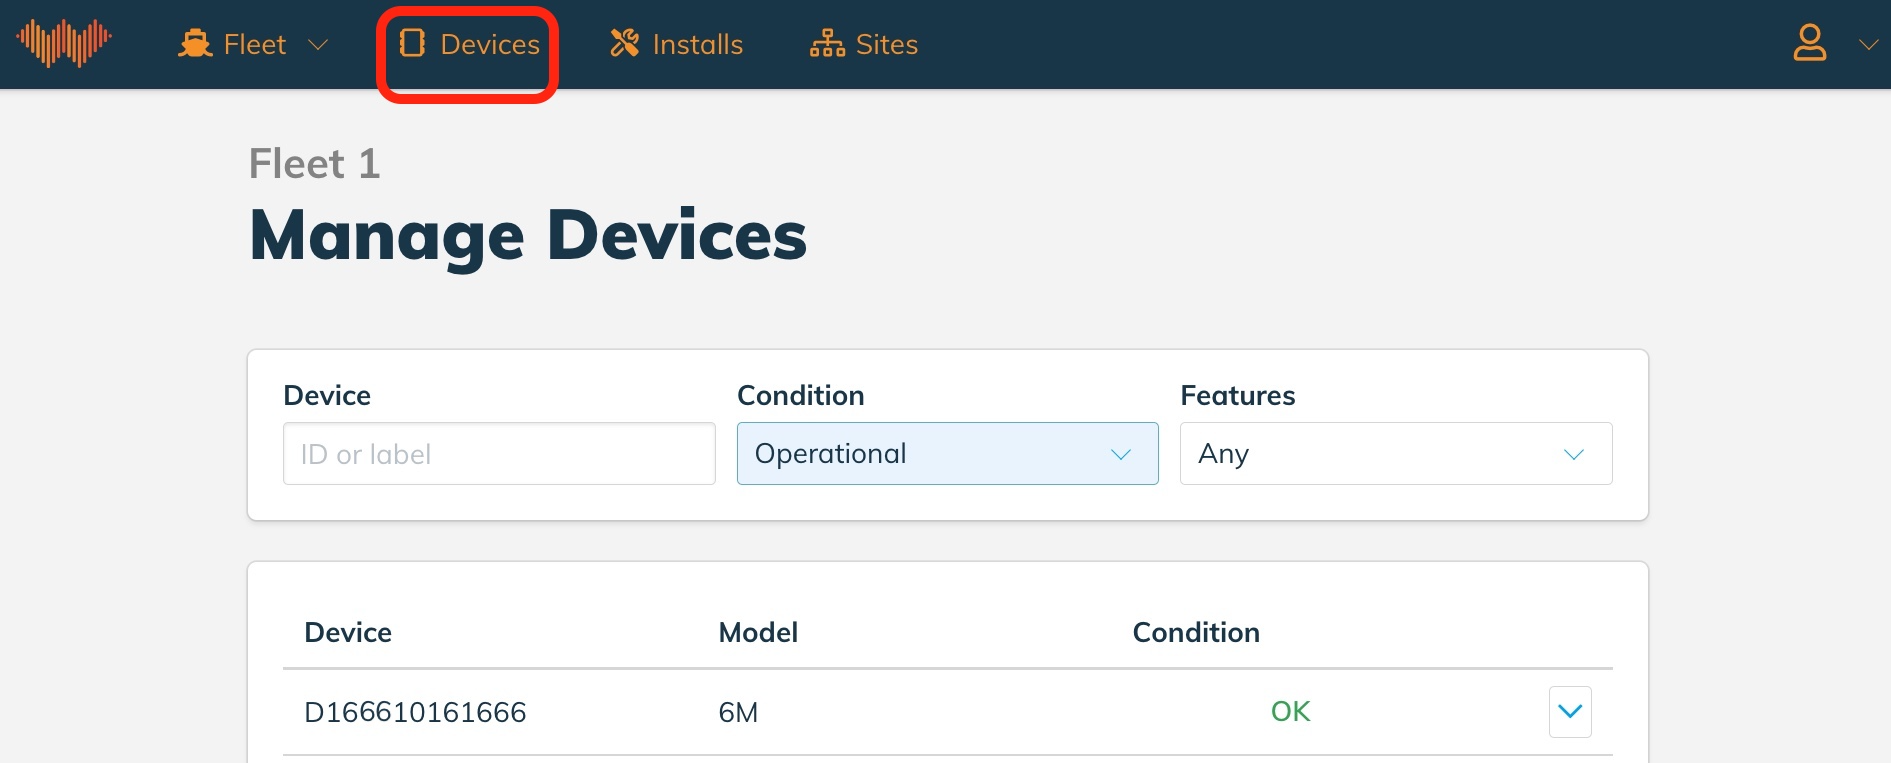
The Manage Devices page provides a listing of the devices assigned to the currently selected Fleet, and provides access to further information about the device, including real-time energy data.
Click on the Devices page in the Menu Bar to access the Manage Devices page.

Device search functionality
The first section of fields at the top of the device list provides access to the search functions for a device, condition or feature to be found quickly in the list of devices.

The fields can be used independently or combined together to perform fast and powerful filtering for particular devices in desired conditions and with particular features.
Device ID or label
Enter a Device Serial Number (Device ID) or the device name to search your fleet group for these devices.
The device name is set in the Wattwatchers Onboarding application during the device installation process. Please see our Wattwatchers Onboarding Application User Guide for more information.
Tip: A partial Device Serial Number or Device Name can also be used for quick searches.
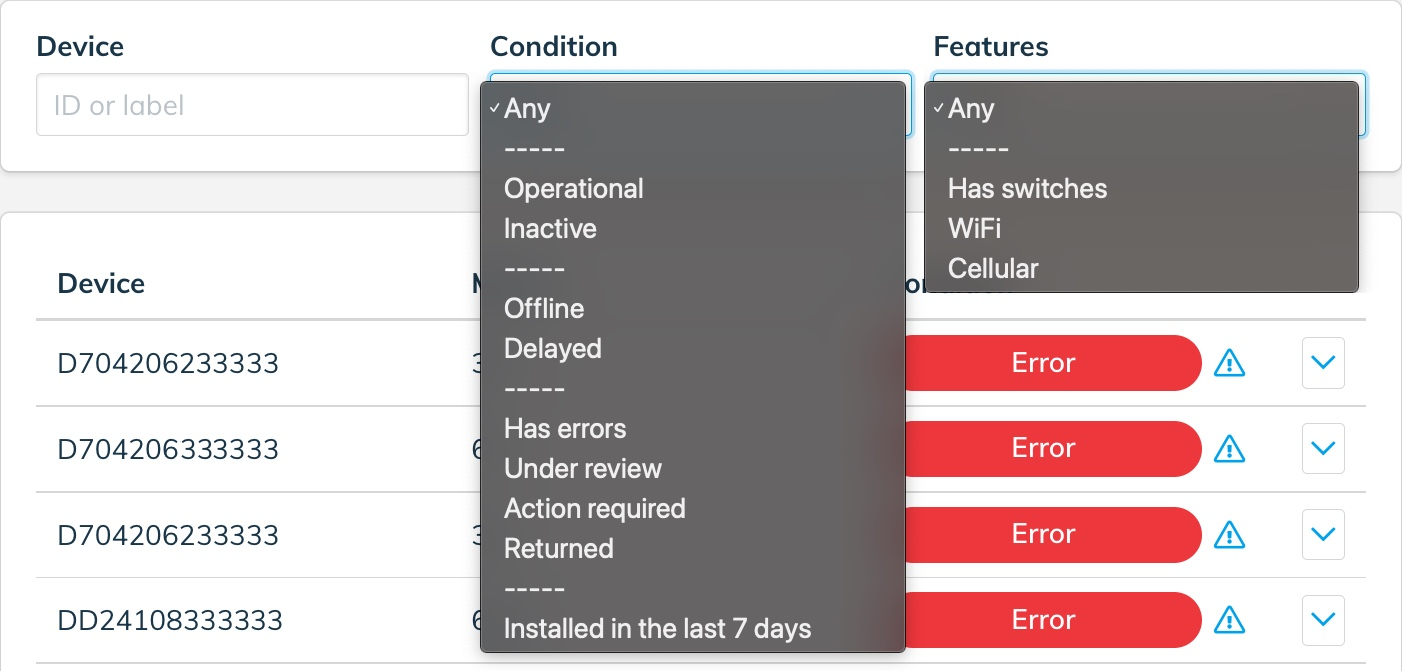
Condition
Select from one of the conditions to limit the searches to only devices in that state.
- Any - lists all devices (default)
- Operational - display devices that are online with no errors or warnings
- Inactive - list devices that have not yet come online (i.e. have not been installed)
- Offline - display devices that have not communicated with our systems for over an hour
- Delayed - list devices that have not communicated with our systems within the past 15 minutes
- Has errors - display devices that have been flagged by the Wattwatchers support team as having identified and ongoing errors
- Under review - list devices that have been flagged by the Wattwatchers support team as requiring additional review (i.e. troubleshooting or exhibiting behaviour that requires further attention)
- Action required - display devices that require action from the Wattwatchers team to resolve an issue
- Installed in the last 7 days - list any devices that have been installed in the last 7 days
Features
Select from one of the features to limit the searches to only devices with those features.
- Any - all devices
- Has switches - limit the search results to show only devices with switching capabilities
- WiFi - limit the search results to only list devices that support WiFi communications
- Cellular - limit the search results to only display devices with cellular communications (e.g. 3G or 4G)
Device list
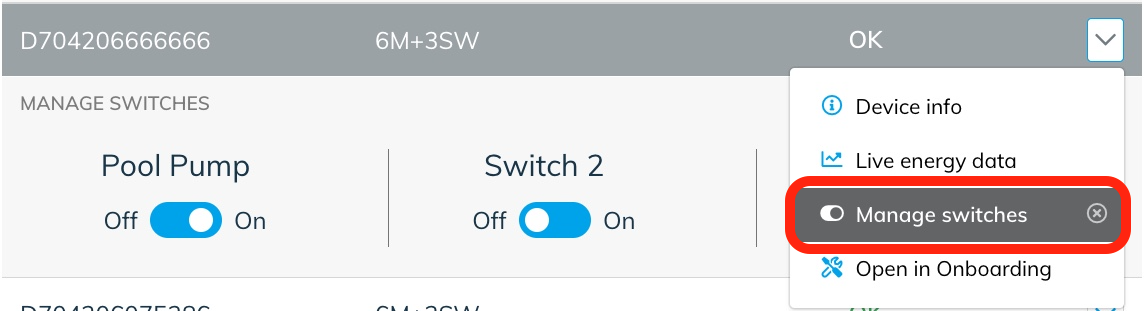
The Device list provides summary information on each device in the main listing and a drop-down menu that provides access to additional information about the device—general information on status, including communications, Live energy data, and Manage switches which provides access to view and modify the switch state for individual devices (only displayed for devices that have switching capability).

Basic device information
Each row displays the device name (if configured), Device Serial Number (Device ID), Model and condition that match the search criteria.
If no search criteria are entered, then all devices in the fleet group are displayed in the list.
Click on the down arrow icon on the right-hand side of a row to display a menu to access Device info, Live energy data and Manage switches (devices with switching capability only).
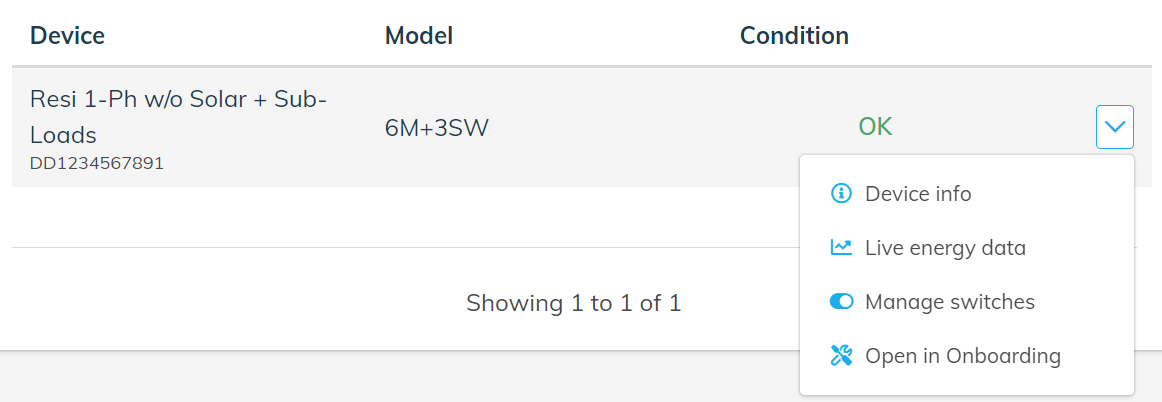
When selecting one of these options, the row will expand to show the additional information.
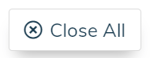
It is possible to have the additional information displayed for multiple devices at a time. This can be useful when trying to view multiple devices simultaneously for installation and support tasks. If you have multiple views open, you can click on the floating Close All button at the bottom of the screen to close all additional information views at once.
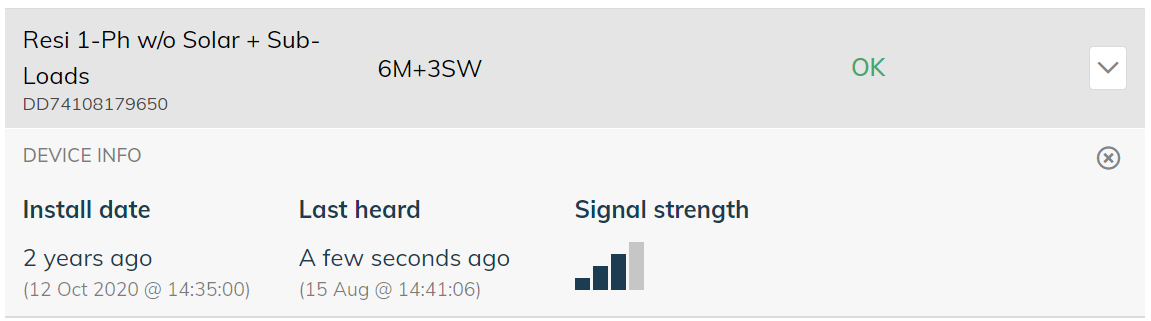
Device info
The Device info expands the row for the device, displaying information on when the device was installed, last communicated and communications network signal strength.
 Click on the
![]() icon in the upper right corner to close this additional information panel.
icon in the upper right corner to close this additional information panel.
Live energy data
The Live energy data provides real-time charts of each energy measurement channel of the device. This is useful for quickly viewing the energy measurements to support in-field status checks, debugging and support requests.

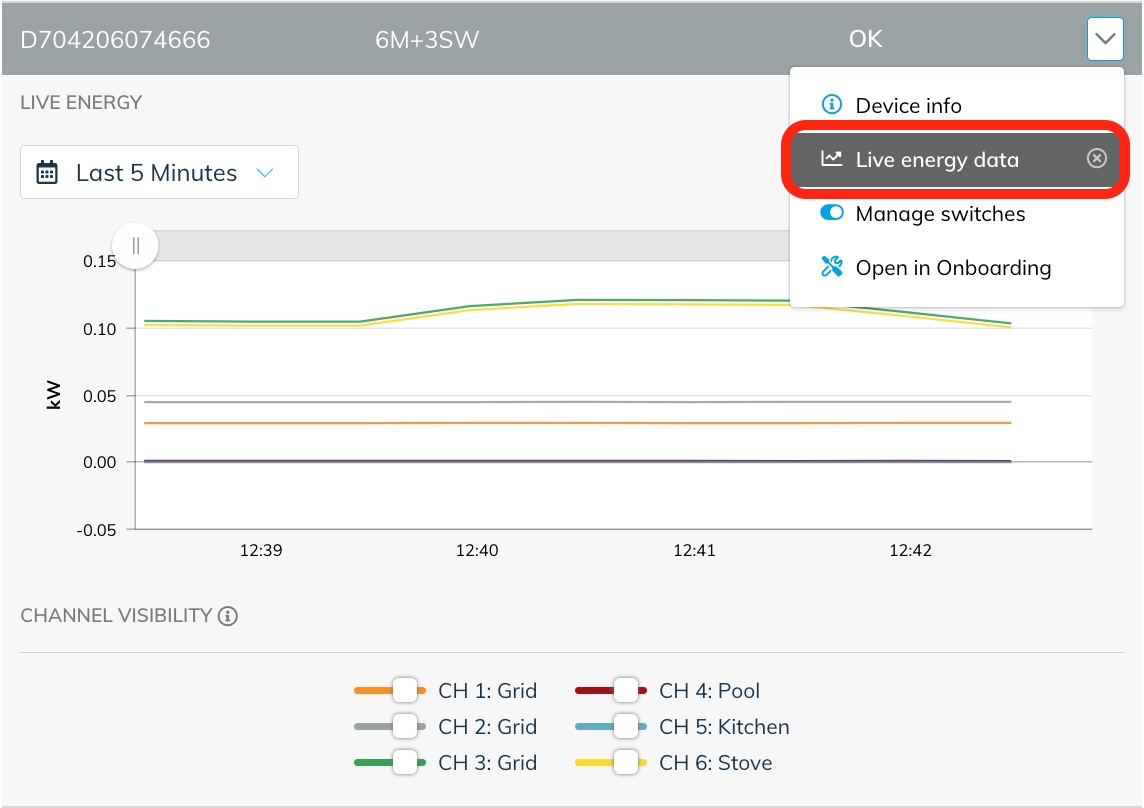
Select the desired date range from the time period drop-down menu on the left hand side of the Live Energy view. This provides a range of options to view data from the last 5 minutes, all of today (since midnight), yesterday and other time periods.

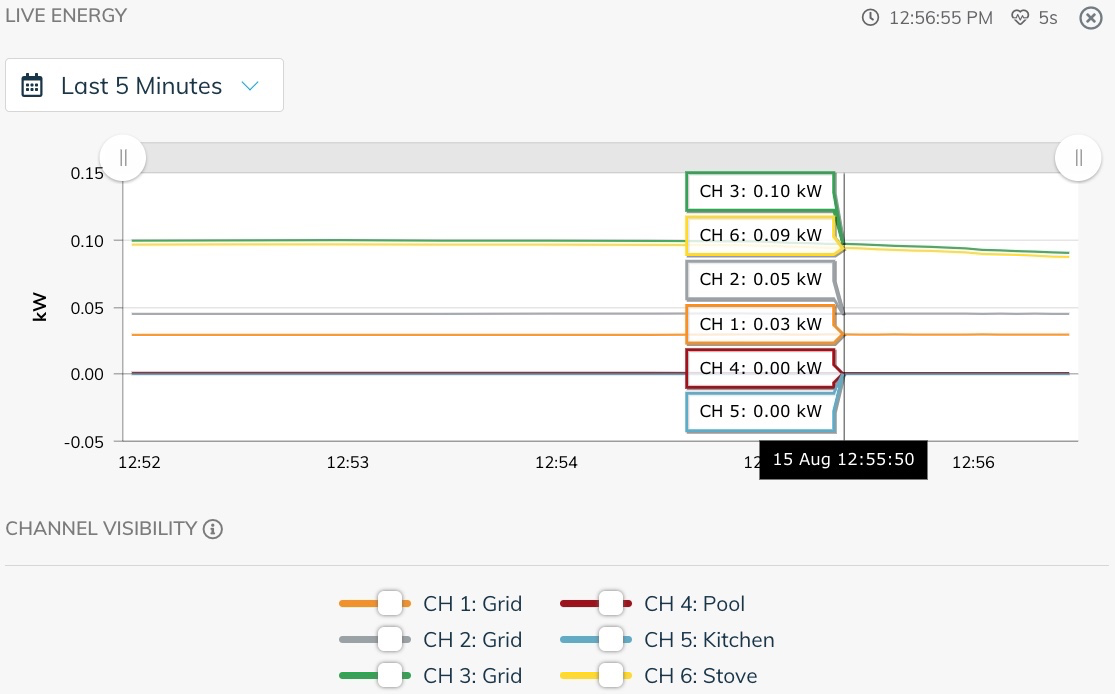
Each lines on the chart can be made visible or hidden using the sliders next to each channel name underneath the chart.
- Single click on any channel to view or hide it on the chart.
- Double click on a channel to show only that channel and hide all other channels.
- Use the Reset view option to restore the chart to the default view with all channels visible.

Use the slider above the chart to limit the range of data being displayed to a smaller period of time. This can be useful to zoom in on a feature of interest.
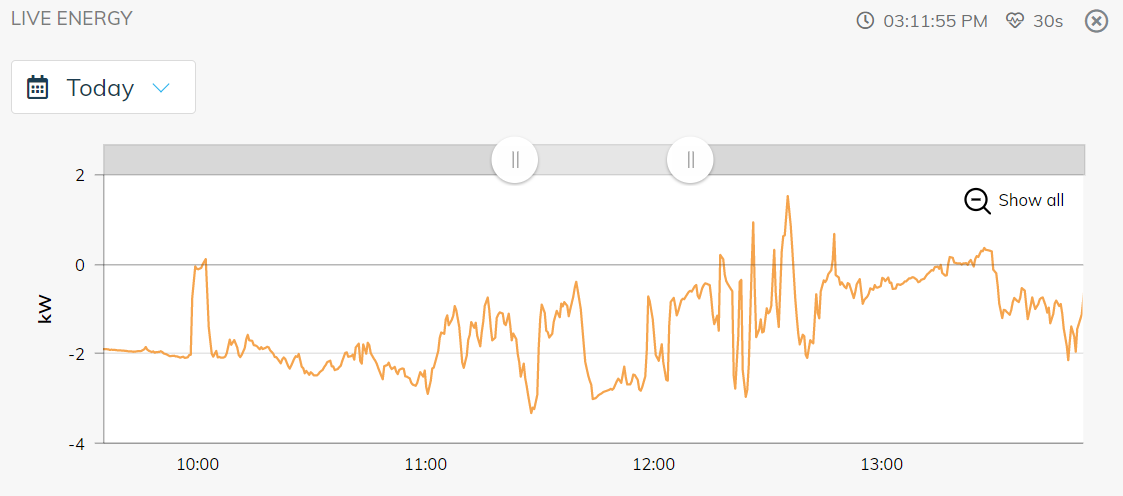
You can also zoom in by clicking and holding the mouse button while selecting a time period directly on the chart itself. Release the mouse button to view the selected range. Click on the magnifying glass "Show all" icon to return to the full view of all of the data.
The Clock and Heartbeat icons at the top right of this section are used to display information about the data being received from the device.

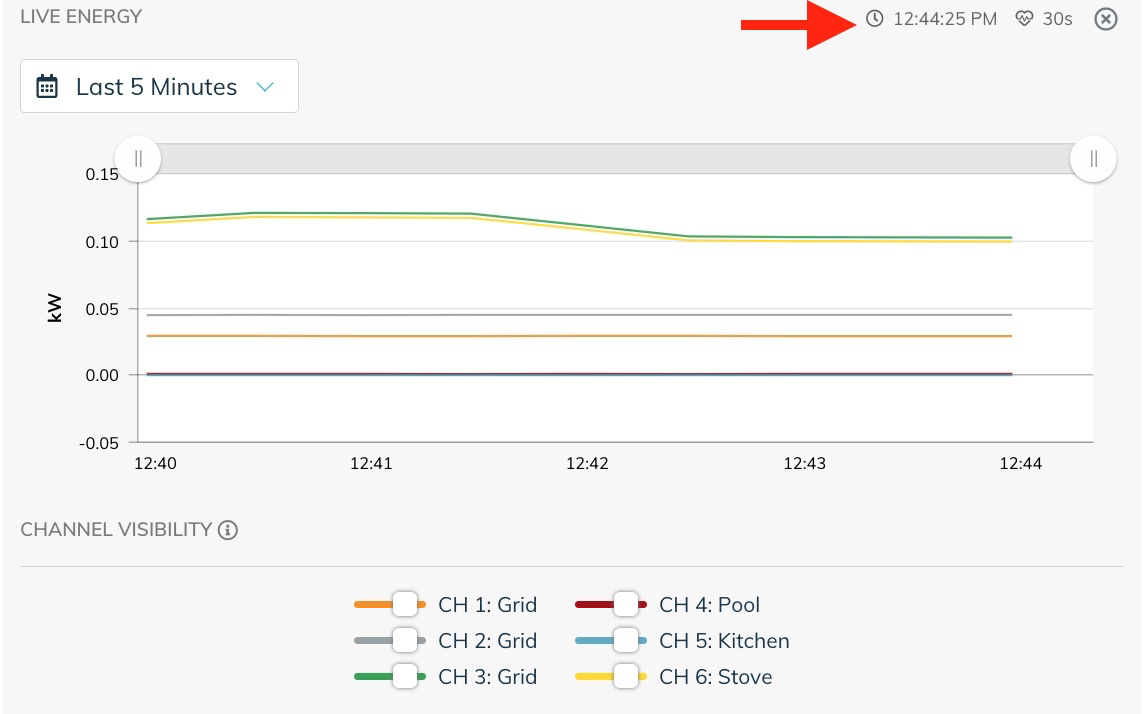
The value next to the Clock icon is the timestamp for the data last received from the device. This can be used to confirm that the data being received has been received recently and has the correct current local time of your desktop or mobile device.
The value next to the Heartbeat icon is the rate at which data is being transmitted by the device. A value of 30s indicates the device is sending data every 30 seconds.
If the device is transmitting data every 5 seconds (such as during Onboarding activities), this is indicated by a value of 5s with the Heartbeat icon as shown below.

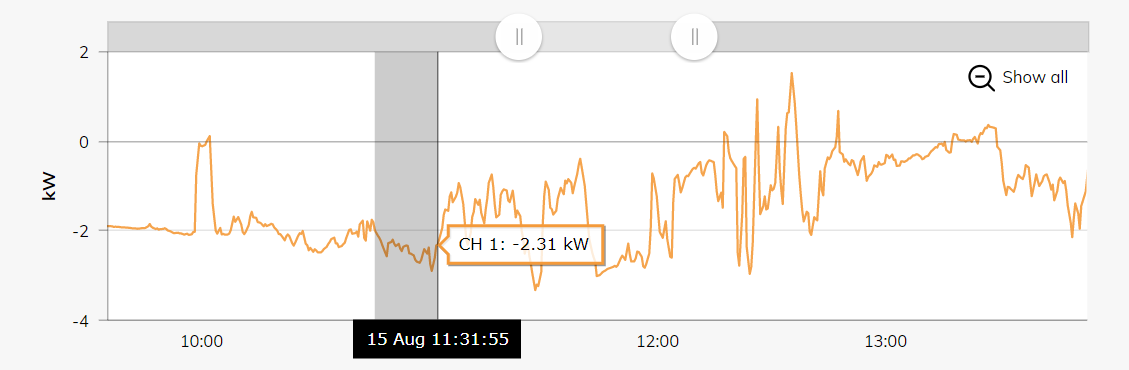
On a desktop web browser, hover the mouse over the chart lines to see the actual values displayed at different times by moving from left to right.

Click on the ![]() icon in the upper right corner to close the live energy data view.
icon in the upper right corner to close the live energy data view.
Manage Switches
The Manage switches section provides access to monitor and change the current switch states for devices with switching controls.

The state of the switch can be changed by selecting the desired toggle switch.
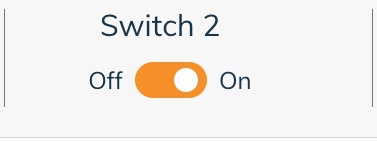
Note that once the switching button is activated, the device will typically change state within 30 seconds. However, the switch icon will become grey and unavailable for up to 90 seconds while the operation of the switch is actioned by the device and confirmed by the Fleet application.


Once the switch is ready for another operation, the control will return to normal colour and can be toggled again as required.

Click on the ![]() icon in the upper right corner to close the switching controls.
icon in the upper right corner to close the switching controls.
CSV Export
The CSV Export provides a simple, powerful, and flexible way to download energy data from a selectable date range.
Select the CSV Export option from the drop down menu next to a device.
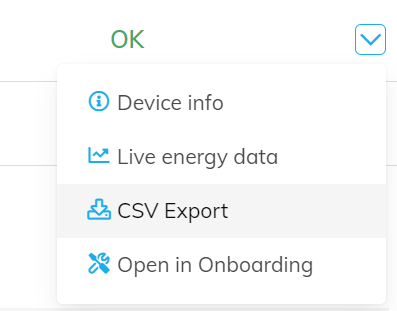
The device information row then expands to show the CSV export options for the time range and granularity.
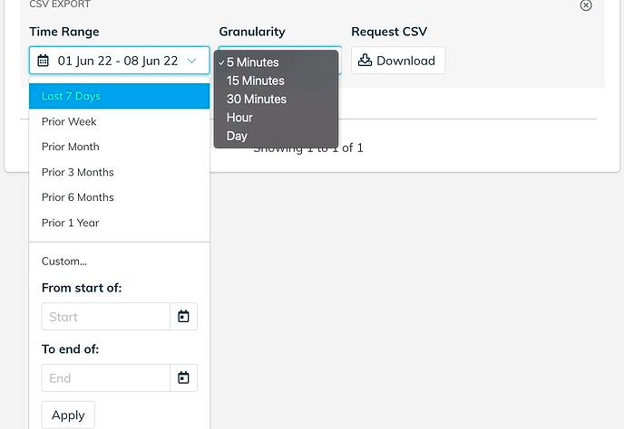
The granularity of energy data is also adjustable from a 5-minute interval to a daily interval depending on the application.
- Set the Time Range option to the desired start and end dates for the period of data to download.
- Select the desired Granularity from the available options (5 minutes, 15 minutes, 30 minutes, Hourly or Day). Note that the higher resolution data (particularly 5 minute data) will be much slower to download over a long Time Range.
- Click on the Download button to start the download process.
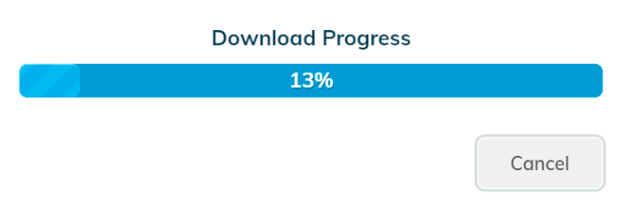
- A Download Progress bar will be shown and the download will begin.
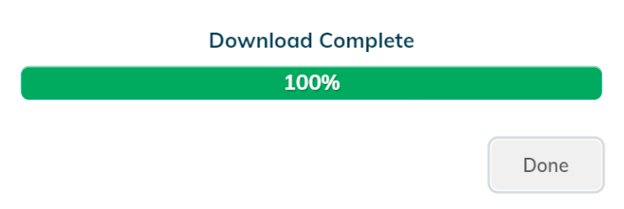
Note that you can not complete any other operations in the Fleet tool until the download process has completed. Wait for the progress to finish and reach 100% or click on the Cancel button to stop the process.
Once the download is complete, you can click on the Done button to close the Download Progress message window.
Please note that while it is possible to select large date ranges such as 12 months or more, the time for the download process will depend on the granularity and period requested. For example, downloading 12 months of 5-minute data generally takes 3-5 minutes per device.
The Fleet CSV Export currently only supports Long Energy (5 minute) data. Exporting Short Energy or data from Modbus devices is not currently supported.
Visit this page to learn more about the data format of the Fleet CSV Export Format.
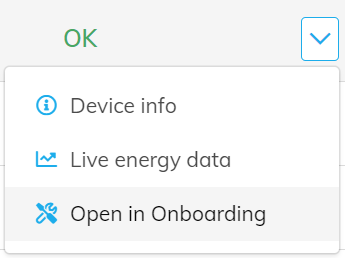
Open in Onboarding
This feature provides quick access to open and edit the configuration of a device from the fleet view.
Use the Open in Onboarding item in the drop-down device menu to quickly open the device in a the Wattwatchers Onboarding application in a new tab.
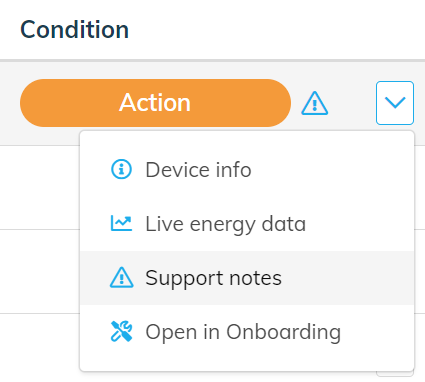
Support Notes
If an issue is detected with the device or data, there may be an Action alert on the device and the additional Support notes option becomes available in the drop-down device menu.
Select the Support notes option to see more information on the issue and what action is required.
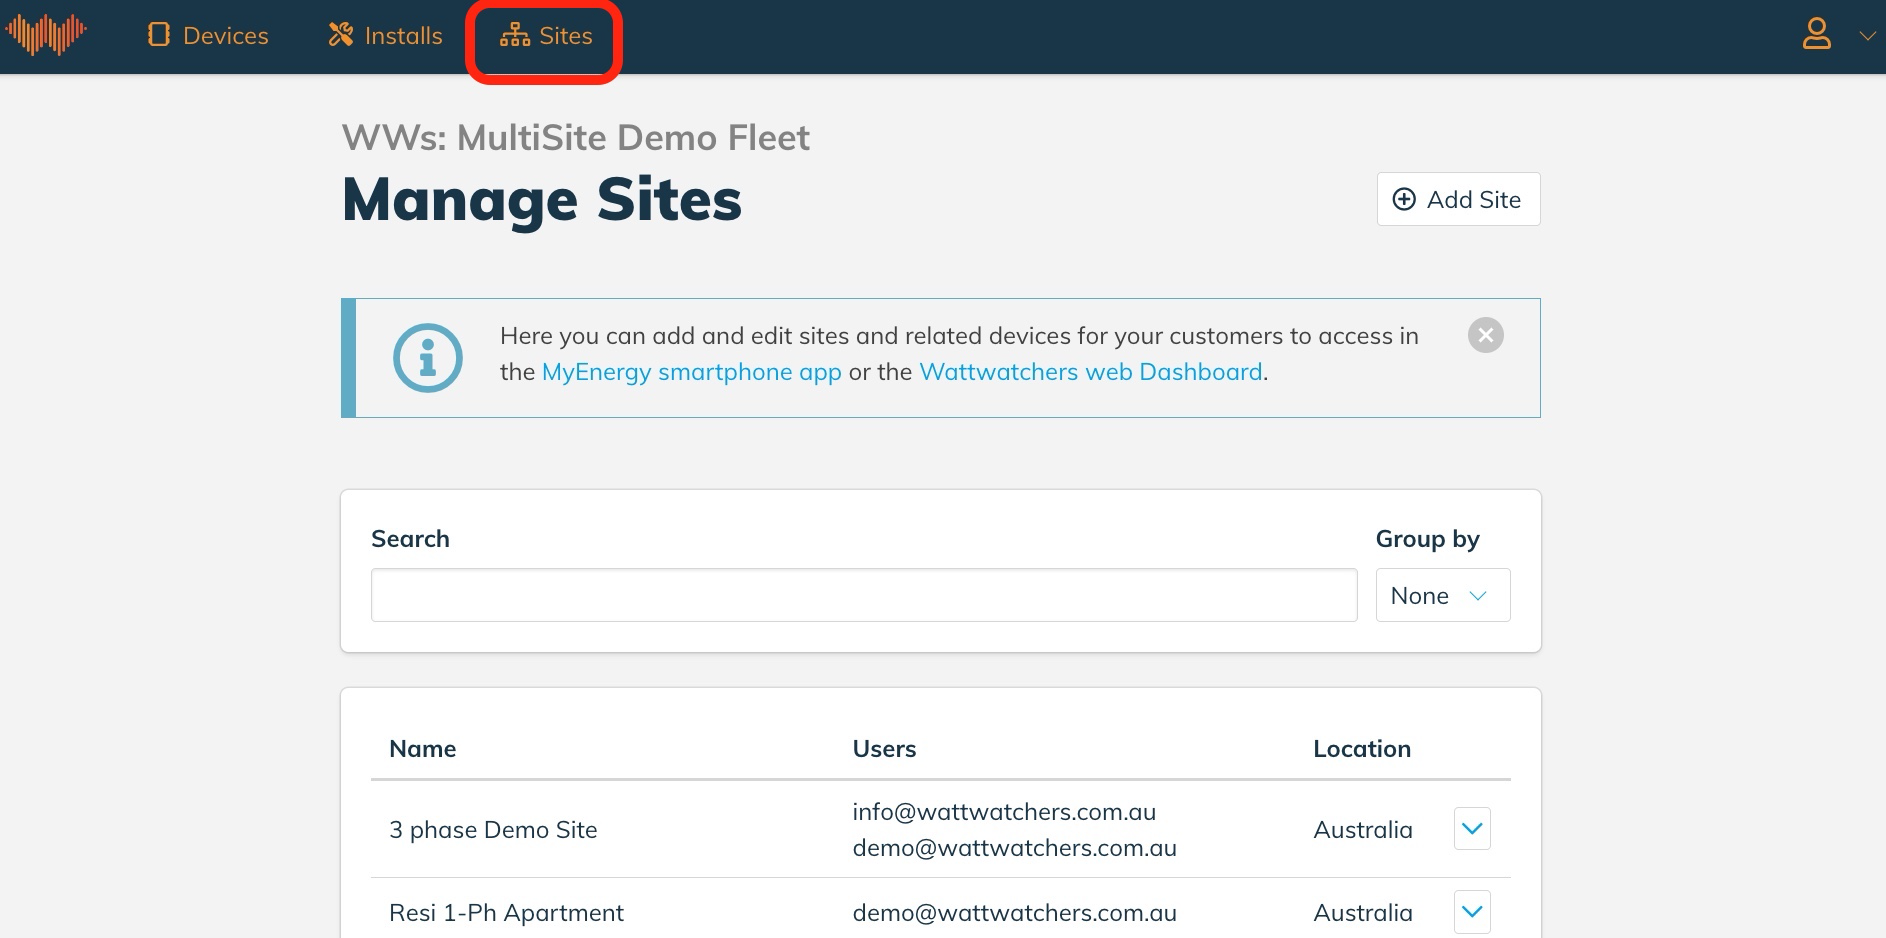
Manage Sites
The Manage sites page provides access to create and manage sites for the selected fleet.
Sites are used to group devices together and manage access for end-users to the data from Wattwatchers devices for the Dashboard and mydata.energy applications.
Click on the Sites item in the Menu Bar at the top of the page to access the Manage Sites page.

Site search functionality
The search fields just above the list of sites provides access to the search function to quickly locate a device.

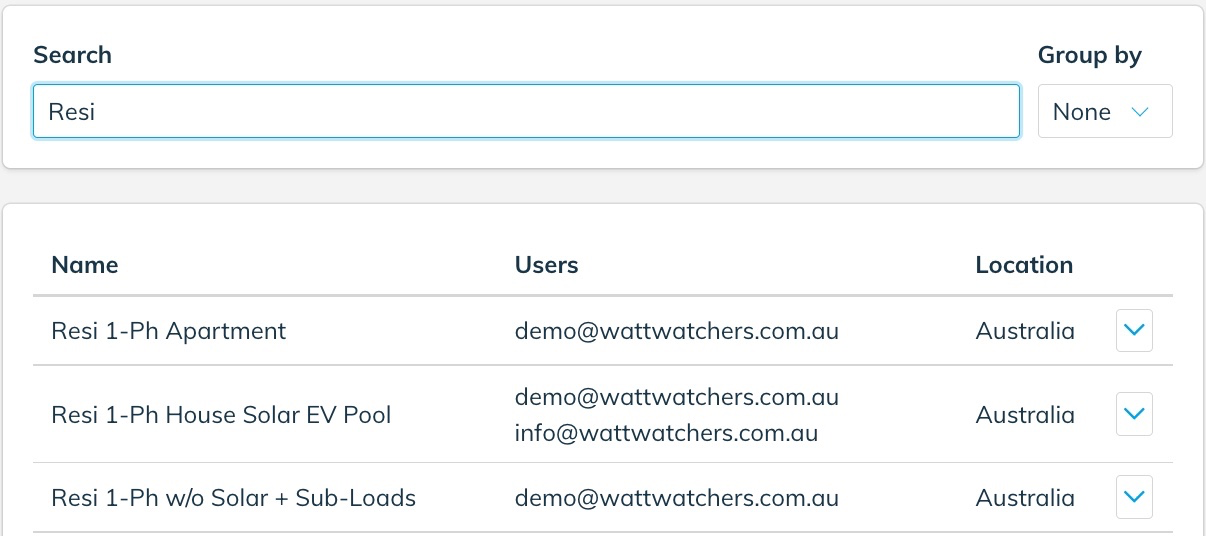
The Search field supports a wide range of data to quickly and easily find sites based on entering information such as:
- Site Name
- Suburb
- Email address
- Device Serial Number (Device ID)
The search text can also be partially entered such as the start of the name of a place, device name or even the start or the end of a device serial number.
The Group By field allows search results to be grouped based on:

- None - no grouping. Results will be displayed sorted alphabetically by site name.
- User - sites will be grouped based on the assigned user email addresses sorted alphabetically.
Sites list
The Sites list provides summary information on each site in the search results and a drop down menu to manage the site.
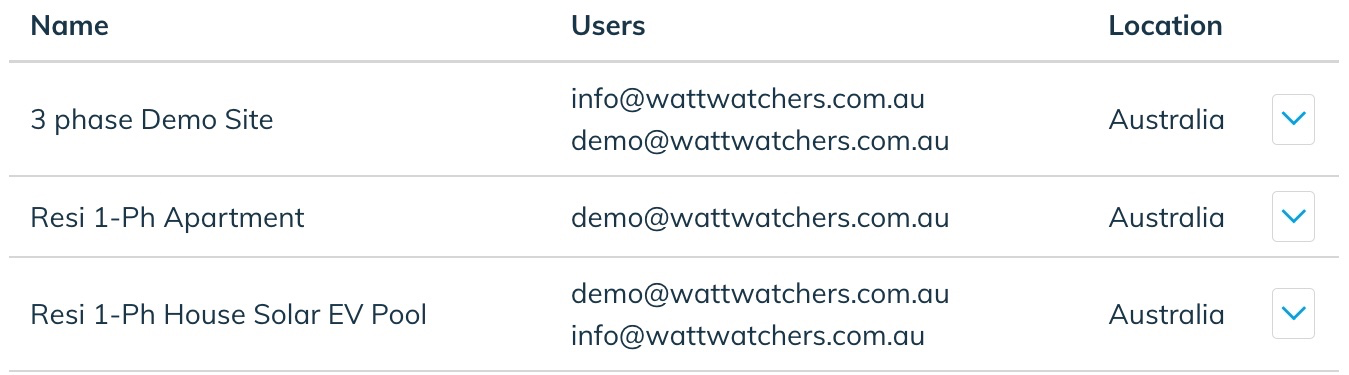

The Site list provides the following information:
- Name - The site name
- Users - The list of email addresses of the users assigned to the site
- Location - The suburb, postcode and country of the site
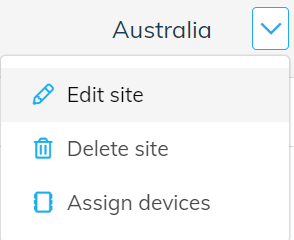
Click on the down arrow icon on the right-hand side of a row to display a menu to Edit site, Delete site or Assign devices.

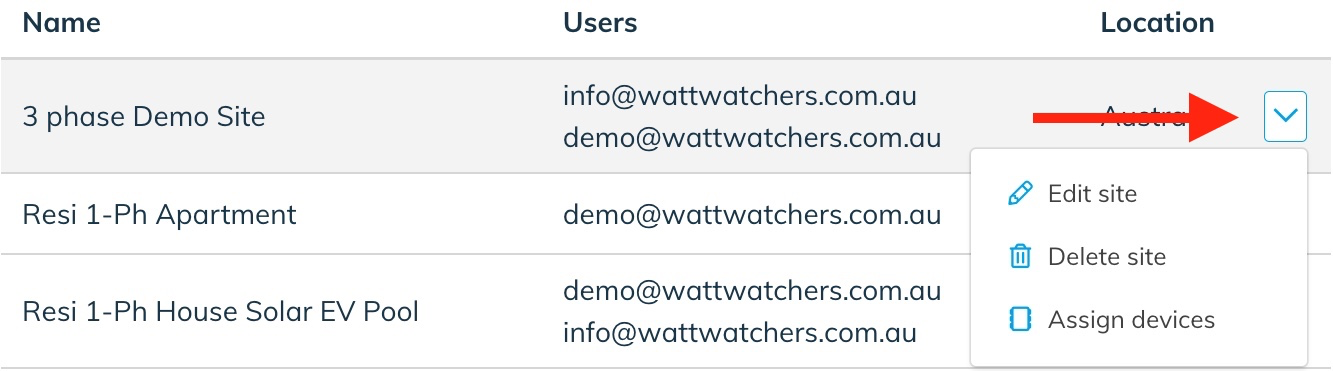
Each of these options takes you to the relevant section of the Edit site page.
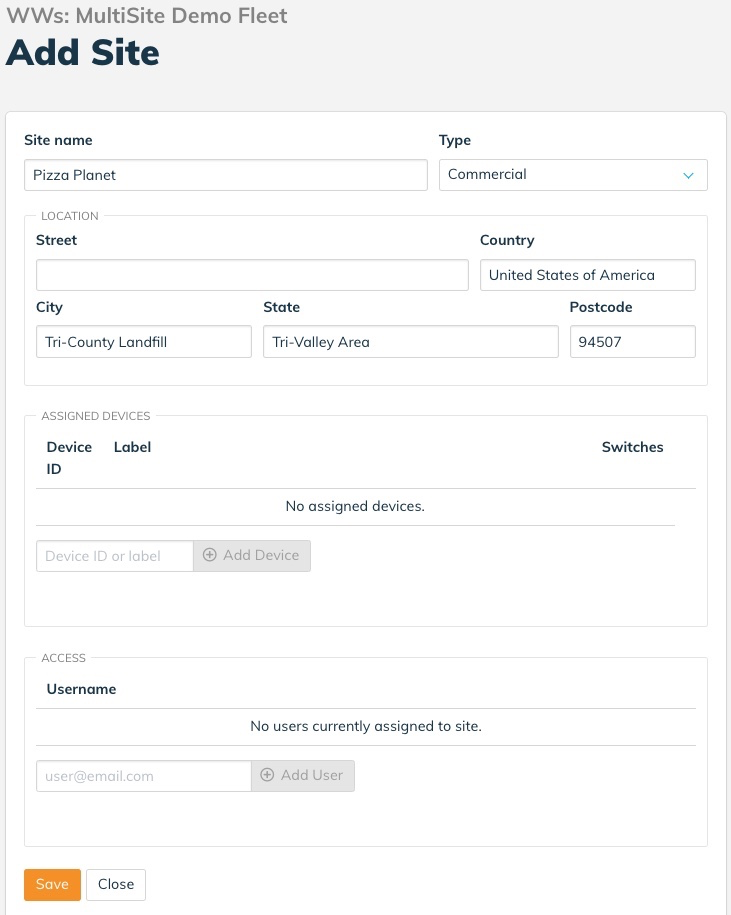
Add or Edit Site
The Add Site and Edit Site pages provide a series of fields to create the site including site name, address and the associated device serial number (Device ID) and user email addresses.
Use the Edit site option in the drop-down menu to edit an existing site.
Or click on the Add Site button to start the process of creating a new site.
The Site details page will then be shown as below.

Save or cancel changes
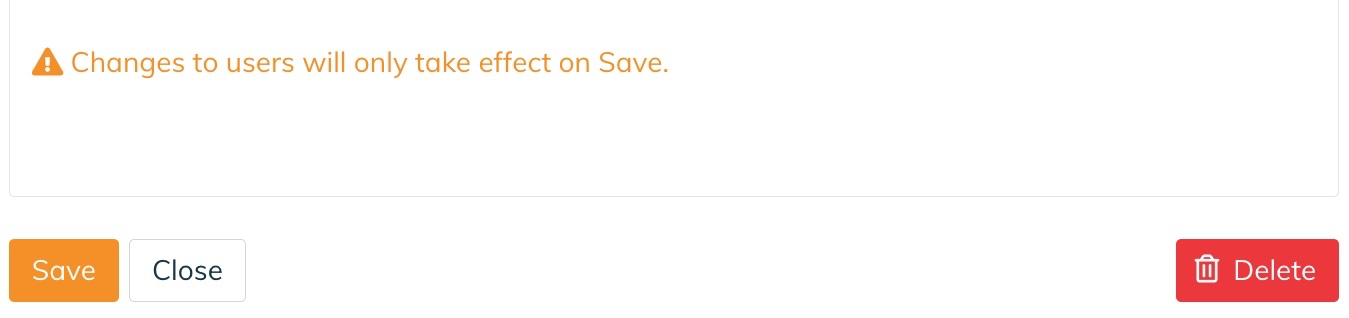
After making any changes to the site, you must click on the Save button at the bottom of the page to save the information.


If you do not wish to save the changes, click on the Close button to go back to the Sites list without making any changes.
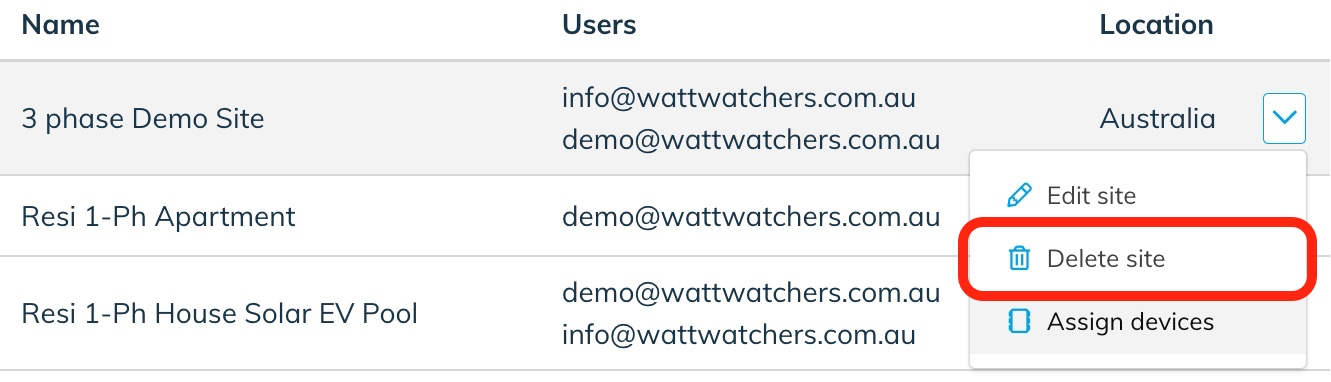
Delete site
To delete a site, including any association with users and devices, select the Delete Site button from the dropdown list from the down arrow icon on the right-hand side of a row (as shown below) or the  button at the bottom of Add/Edit Site page.

Note that this does not delete the actual devices or users from the Wattwatchers platform, but prevents further access to the devices for those users.
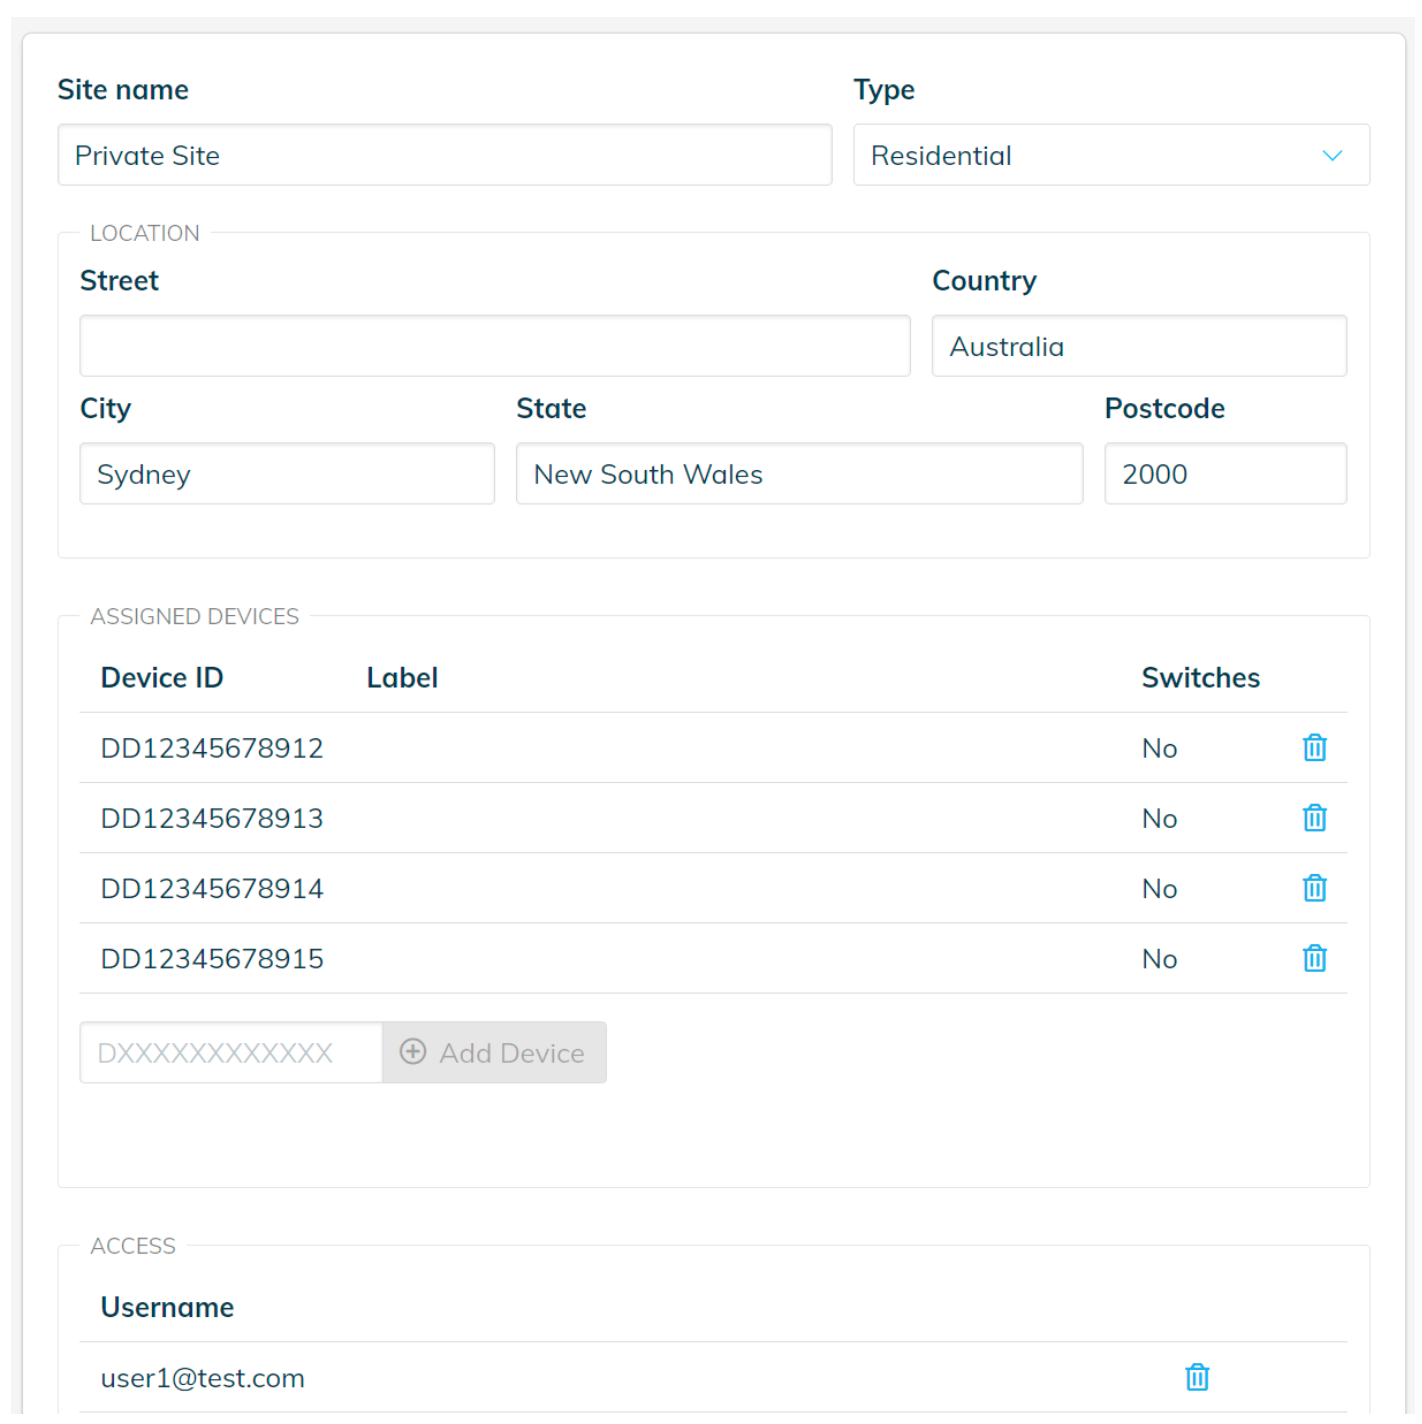
Site Address Information
The site form contains the following fields:
- Site name - a custom name for the site which can be set based on your project or business preferences (eg: customer name or business name).
- Type -from the following list of options:
- Not Set - initial default setting for an undefined site type
- Residential - residential site (e.g. a private house)
- Commercial - small or large commercial business or enterprise site
- Government - a site that is used by a government agency
- School - for schools and education institutions
- Location
- Street - enter the street address where the site is located (e.g. 123 Test Street)
- Country - the country where the site is located (e.g. Australia)
- City - the suburb or city where the site is located (e.g. Sydney)
- State - the state where the site is located (e.g. New South Wales). When the Country is set to Australia, the City field must be set to a valid state from the list displayed while typing.
- Postcode - the postcode or zipcode where the site is located (e.g. 2000)
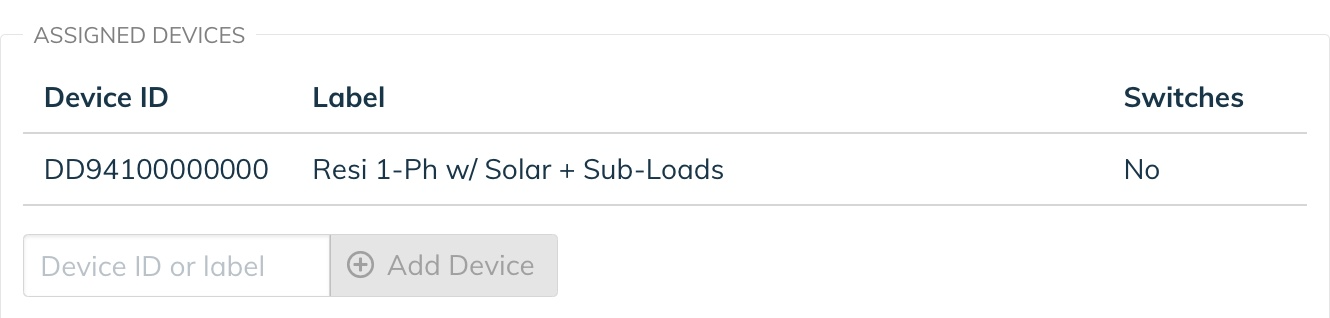
Assigned Devices
The assigned devices section displays a list of the assigned devices, identified by serial number and label.

Note that when assigning devices, the following device and site grouping concepts apply:
- A device can be assigned to one or more fleet groups.
- A device can be assigned to one or more sites in the same or different fleet groups.
Delete a device
To delete an assigned device from the site, click on the trash bin icon next to the relevant row.

Add a new device
To assign a new Device to the site, enter the Device Serial Number and click on the Add Device button.

 If an invalid Device Serial Number is detected, an error message will be displayed. This may be because the Device Serial Number is incorrect or you do not have access to that device (i.e. the device is not part of the currently selected Fleet).
Please check the Device Serial Number (Device ID) is correct before trying again. If you are sure that the device is available in the current Fleet and the issue persists, please contact Wattwatchers Support.
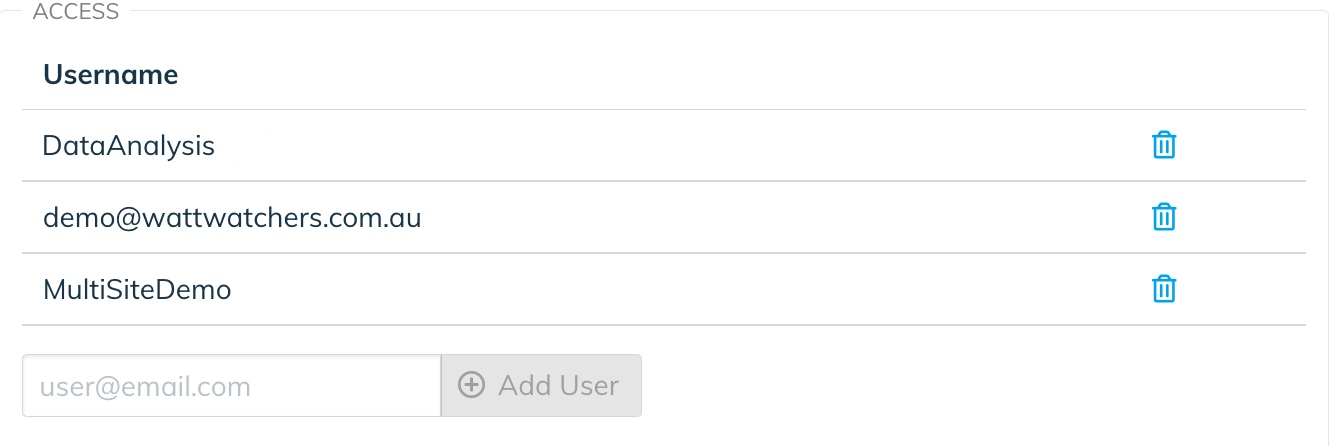
Access
The Access section provides a list of email addresses of the users who have been assigned access to the site, and the switching permissions for each of the users.

Switch Permission
The Switch Permission determines if a specific user can access the switching controls to turn devices on and off for devices with switching capabilities in the Dashboard and mydata.energy apps.
This option is only displayed for devices that have switching capabilities.

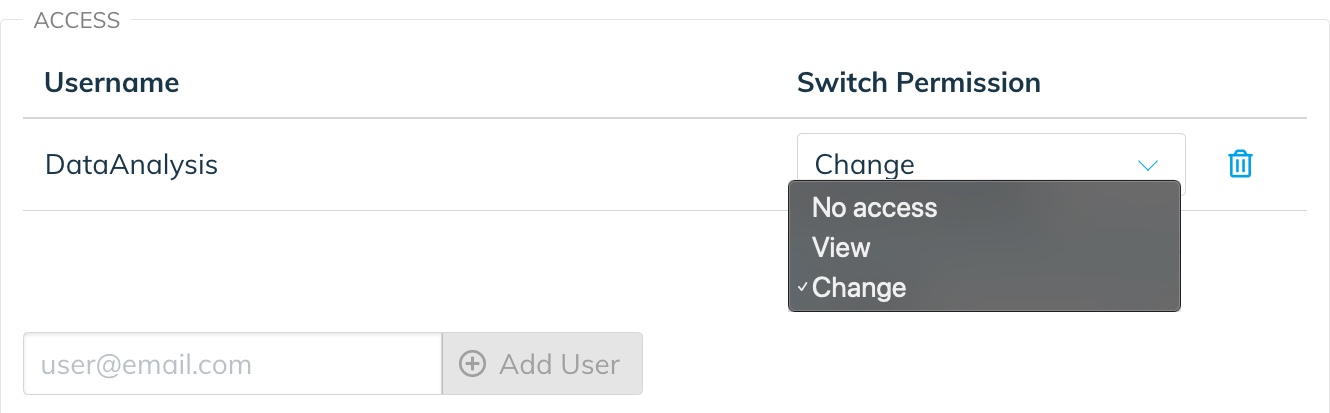
- No Access - this user can not view or change the switch state (i.e. turn it on or off)
- View - this user can see the switches and their state (on/off), but not change the switch state
- Change - this user can view and change the switch state (this is the default value)
Set the Switch Permission to the desired value for each user.
For more information on configuring devices switching capabilities, please refer to our Onboarding application user guide.
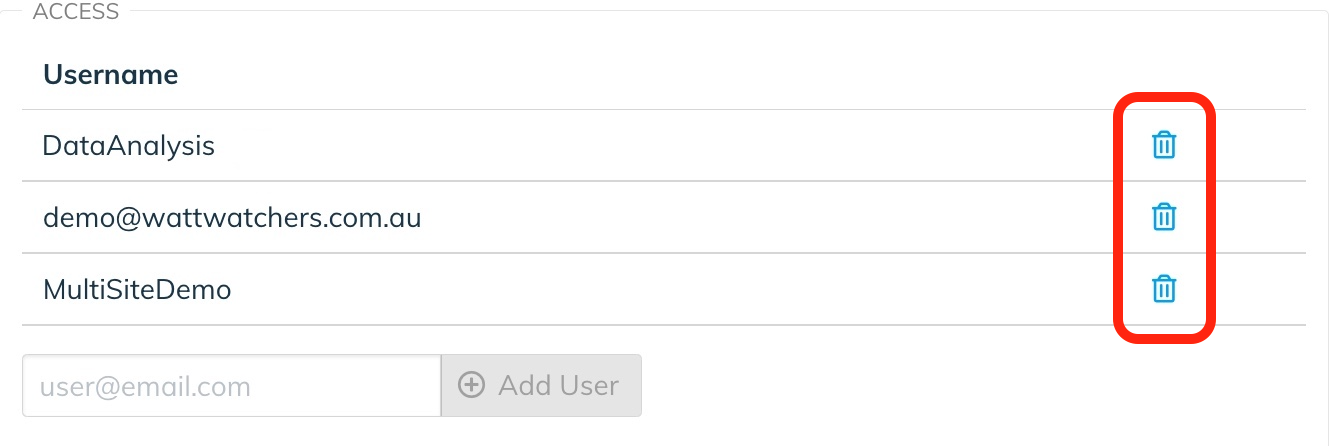
Delete a user
To delete an assigned user, click on the trash bin icon next to the relevant user row.
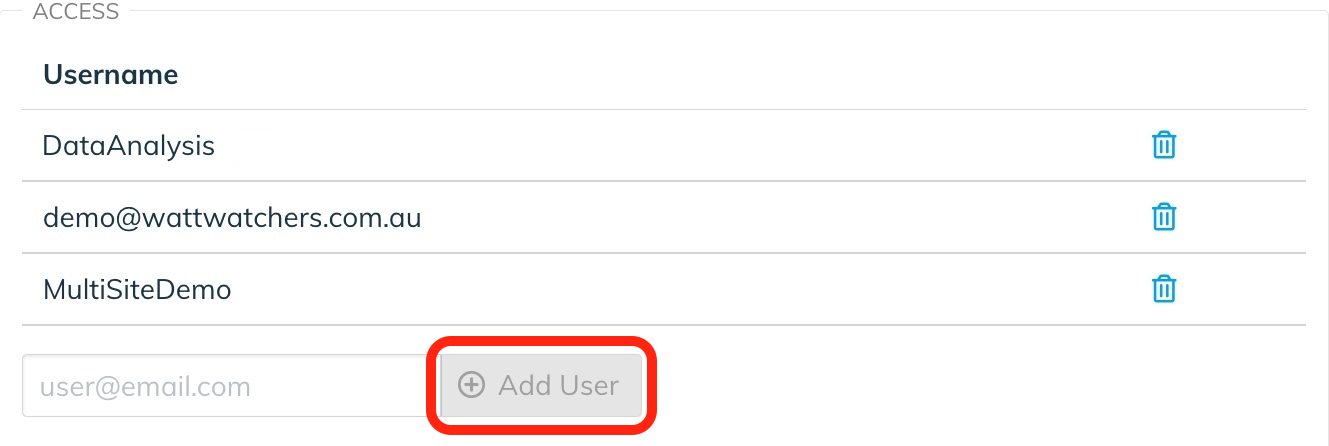
Add new user
To add a new user to the site, enter the email address in the field below the username list and click on the Add User button.

After adding a new user, review and change the Switch Permission if required.
New user notifications
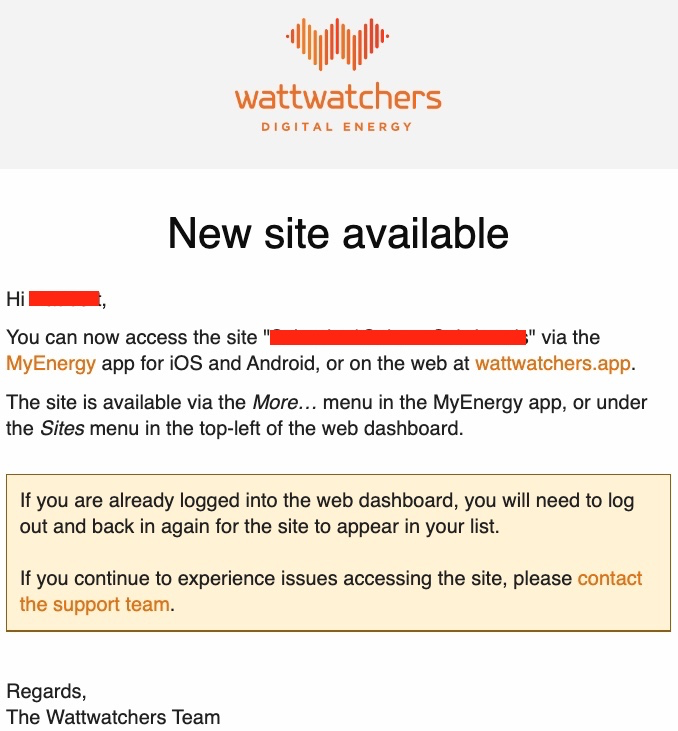
When a new user is added to the system for the first time, the system will automatically send an email notification to the user with information about how to log in to the Dashboard or MyEnergy.
When any user is added to a site, they will receive an email notification (as shown below) that they have access to this site (but no further log in details).
Save changes
After making any changes to the site, you must click on the Save button at the bottom of the page to save the information.
Site access privacy considerations
The device and site configuration settings have an impact on the data visible to both users of the system and to customers.
The Device Name and Site Name are visible to all users who have permission to access the device or site respectively. This includes business users of the Fleet application as well as end customers using the Dashboard and MyEnergy mobile application.
Care should be taken to consider if personally identifying information is included in Device or Site names, and this personally identifying information should be removed if you need to support sharing of site or device details, while maintaining customer privacy. This may require Device Name and Site Names to be removed or changed to values that do not directly identify a customer.
The following example shows a site configured for Private access to multiple devices, where the Site Name has been set to “Private Site” and the Device Names have been removed to ensure that anyone who accesses this Site do not see personally identifying information.
Please note that the Device Name can only be changed in the Wattwatchers Onboarding application (not via the Fleet app) at this time.
Please talk to your Wattwatchers account manager or contact Wattwatchers Support if you need further assistance setting up private or anonymous sites.
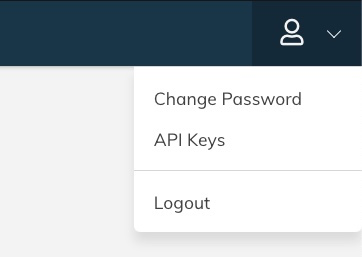
User menu
The User menu at the top right corner of the Fleet page provides access to change your password, view API keys and to logout of the system.

Change Password
Select the Change Password option to change your current password.

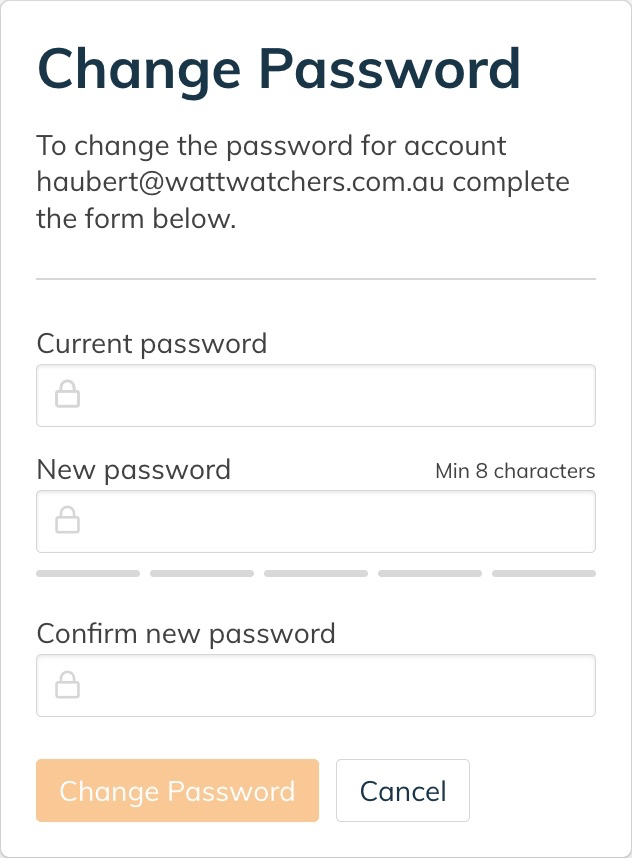
Enter your current password in the Current password field.
Enter a new password into the New password field. Enter the same value into the Confirm new password field.
Any error messages about the passwords will be displayed at the top of the change password area. Please review these messages before changing your password.
Click on the Change Password button to save the new password.
API Keys
API keys allow external software systems to access this Fleet’s data via the Wattwatchers API. Details of the API key and how it’s used with the API can be found in our API documentation on Authentication.
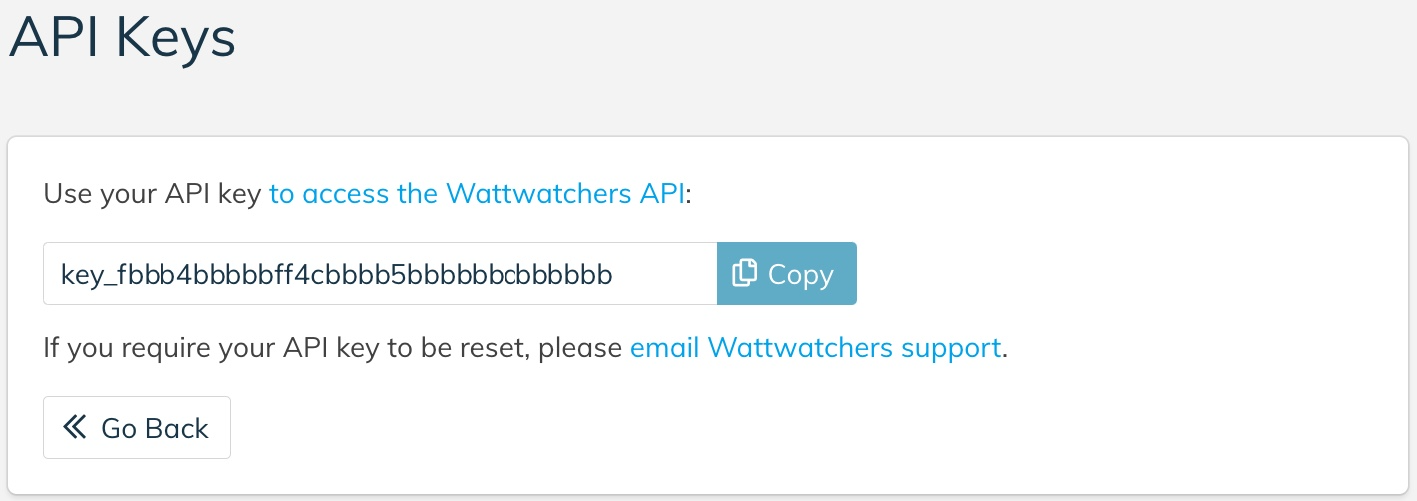
The API is essentially a password that provides access to all device information, and thus should be treated very carefully to ensure it is stored and communicated securely at all times.
We provide this API key via the Fleet management tool as this is SSL encrypted and thus is a secure method of communicating this information.
In the example above, the API has been modified, but your API key will be visible to you when you log into the Fleet application.
Click on the Copy button to copy the API into your computer’s clipboard so you can past it into other applications (such as your system software or code base).
Logout
Click on the Logout item to exit the system and return to the login page.
More information or support
Please contact Wattwatchers Support.